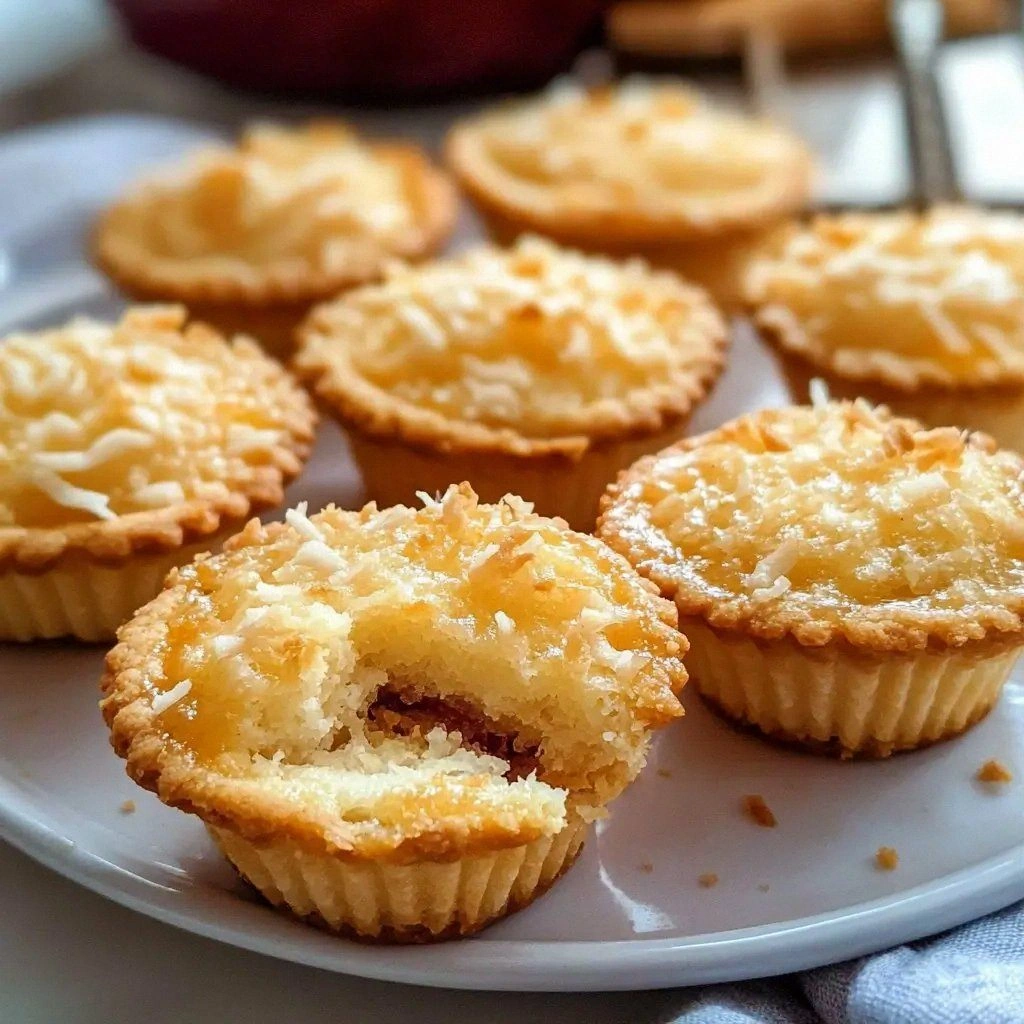
Picture this: a rainy Sunday afternoon, the kitchen lights dimmed to a soft amber glow, and the smell of vanilla and toasted coconut drifting through the air. I was on a mission to turn a pantry staple into a showstopper, and what emerged was a batch of coconut tartlets that made me question every other dessert I’d ever made. The first bite was a buttery, golden shell that crackled like a small, edible sunrise, followed by a silky coconut filling that melted on the tongue like a tropical breeze. The combination of textures—crispy edges that shatter like thin ice and a creamy center that swirls with coconut milk—was a revelation that left me craving more. I dared you to taste this and not go back for seconds, but I’ve already devoured half the batch before anyone else even saw it. That’s the kind of confidence I bring to every recipe I share, and this coconut tartlet is no exception.
I’ll be honest—this is hands down the best version of coconut tartlets you’ll ever make at home. The secret lies not just in the ingredients, but in the technique that turns a simple dough into a caramelized, coconut-infused masterpiece. Most recipes get this completely wrong by overmixing the dough or underbaking the crust, resulting in a soggy, bland base that never rises to the occasion. Here, I’ve cracked the code: a precise balance of fat, flour, and coconut that creates a flaky, golden shell, and a filling that’s both sweet and subtly savory. Picture yourself pulling these out of the oven, the whole kitchen smelling incredible, and the anticipation building as the tartlets cool to the perfect temperature for serving. The aroma alone will convince you that dessert can be an experience, not just a plate of food.
The moment I first tasted the finished product, I knew I was onto something special. The crust was crisp enough to bite through, yet tender enough to hold the filling without cracking. The filling’s coconut milk gave it a silky texture, while the toasted shredded coconut added a nutty crunch that lingered long after the last bite. The subtle hint of vanilla and a pinch of salt pulled the flavors together, creating a harmony that feels both comforting and adventurous. If you’ve ever struggled with making a flaky crust that doesn’t turn out soggy, you’re not alone—this recipe has the fix. The result is a dessert that feels like a vacation in dessert form, and I can’t wait to show you every step of the process.
Let me walk you through every single step—by the end, you’ll wonder how you ever made it any other way. I’ll share the exact measurements, the timing that keeps the dough from drying out, and a few insider tricks that elevate the flavor profile to new heights. I’ll also throw in some micro‑challenges to keep you on your toes, because cooking should be fun, not a chore. Ready? Let’s dive into the world of coconut tartlets and discover why this version stands out from the rest.
What Makes This Version Stand Out
- Taste: The combination of coconut sugar and coconut milk creates a natural sweetness that’s less cloying than refined sugar, allowing the coconut flavor to shine without overpowering.
- Texture: The dough’s ratio of cold butter to melted coconut oil gives the crust a flaky, tender crumb that crisps beautifully in the oven.
- Simultaneous Baking: The crust and filling bake together, ensuring the filling stays silky while the crust reaches a golden perfection.
- Ingredient Quality: Using organic, fresh coconut milk and high‑quality shredded coconut gives depth of flavor that can’t be replicated with instant mixes.
- Make‑Ahead Potential: The dough can be prepared a day ahead and refrigerated, and the filling can be made up to 24 hours in advance, saving you time on the big day.
- Visual Appeal: The glossy finish on the filling and the toasted coconut specks on top make these tartlets Instagram‑ready and crowd‑pleasing.
- Versatility: This base works for sweet or savory variations, letting you switch up the filling to suit any occasion.
- Time Efficiency: The entire process takes less than an hour from start to finish, making it a perfect dessert for busy evenings.
Alright, let's break down exactly what goes into this masterpiece…
Inside the Ingredient List
The Flavor Base
All-purpose flour is the backbone of the crust, providing structure without heaviness. A 2‑cup measure for four servings strikes the perfect balance between sturdiness and tenderness. If you prefer a slightly nutty undertone, substitute half the flour with almond flour—just keep the total flour volume the same.
The Texture Crew
Cold, cubed butter and melted coconut oil work together to create a layered, flaky crust. The butter introduces richness, while the coconut oil adds a subtle coconut aroma that permeates the dough. A pinch of baking powder ensures the crust rises just enough to develop those golden edges without becoming airy.
The Unexpected Star
Shredded coconut is more than a garnish; it’s an integral part of the flavor profile. Using ½ cup of freshly grated coconut adds both texture and a deep, toasted flavor that elevates the entire tartlet. If you’re not a fan of raw coconut, toast it lightly in a dry pan until golden before adding it to the dough.
The Final Flourish
Coconut milk and coconut sugar combine to form the silky filling that contrasts with the crisp crust. The ½‑cup coconut milk provides moisture and a creamy base, while the coconut sugar’s coarser crystals give a subtle crunch when baked. Vanilla extract ties everything together, adding a warm, aromatic note that complements the tropical undertones.
Everything’s prepped? Good. Let’s get into the real action…
The Method — Step by Step
- In a large bowl, whisk together the flour, coconut sugar, baking powder, and a pinch of salt. The dry mix should look like fine sand; this ensures even distribution of leavening agents and prevents clumps. I’ve found that a quick sift over the mixture makes the dough smoother and easier to work with. This is the moment where the scent of vanilla starts to hint at what’s to come.
- Add the cold cubed butter to the dry ingredients. Using a pastry cutter or your fingertips, cut the butter into the flour until the mixture resembles coarse crumbs. The goal is to see small flecks of butter throughout; this will create steam pockets that puff the crust during baking.
- Drizzle the melted coconut oil over the mixture and stir until the dough comes together. The oil should coat the flour without making it sticky. If the dough feels too dry, add a tablespoon of cold water at a time until it holds together. This step is critical for achieving a flaky texture.
- Preheat the oven to 375°F (190°C). While the oven warms, mix the beaten egg, coconut milk, vanilla extract, and ½ cup shredded coconut in a separate bowl. Whisk until the mixture is smooth and the coconut is evenly distributed.
- Pour the coconut filling over the chilled crust, spreading it evenly with a spatula. The filling should sit just above the crust line; this ensures it doesn’t leak out during baking. The filling’s color will deepen as it cooks, turning a creamy ivory to a warm, golden hue.
- Bake for 28 minutes, or until the crust is golden brown and the filling has set. The edges should pull away from the pan slightly, indicating that the crust is crisp. Watch the filling—once the bubbles flatten and the surface looks set, it’s ready.
- Remove the tartlets from the oven and let them cool in the pan for 10 minutes. This resting period allows the filling to set fully and the crust to firm up. After 10 minutes, carefully lift the tartlets out of the pan using the springform’s edges and place them on a wire rack to cool completely.
- Once cooled, you can garnish with a dusting of powdered sugar, a drizzle of melted dark chocolate, or a sprinkle of toasted coconut for an extra crunch. Serve at room temperature or chilled—both options bring out the coconut’s tropical aroma.
That’s it— you did it. But hold on, I've got a few more tricks that'll take this to another level. These insider tips will ensure your tartlets are not just good, but unforgettable.
Insider Tricks for Flawless Results
The Temperature Rule Nobody Follows
Many bakers bake at a high temperature to get a quick crust, but the truth is, a moderate 375°F (190°C) is optimal for coconut tartlets. The gentle heat allows the crust to rise slowly, creating those coveted flaky layers, while the filling sets without overcooking. If you’re using a convection oven, reduce the temperature by 25°F to avoid burning the edges.
Why Your Nose Knows Best
The aroma of toasted coconut is a reliable indicator of when the crust is ready. When you smell a warm, nutty scent rising from the oven, it means the butter and coconut oil are caramelizing properly. Don’t rely solely on the color—smell is your best friend in baking.
The 5‑Minute Rest That Changes Everything
After removing the tartlets from the oven, let them rest for 5 minutes before lifting them out of the pan. This brief pause allows the filling to set, preventing it from sliding off and keeping the crust from cracking. I’ve seen many people skip this step, and the result is a messy, soggy center.
The Right Amount of Sweetness
Using coconut sugar instead of white sugar gives a subtle caramel undertone that pairs perfectly with coconut milk. If you’re watching your sugar intake, you can replace half of the coconut sugar with a natural sweetener like stevia or monk fruit; just keep the total sweetening level balanced to avoid a bitter aftertaste.
The Final Touch of Freshness
A light drizzle of fresh lime zest before serving adds a bright, citrusy note that cuts through the richness of the coconut. Sprinkle a pinch of sea salt on top to highlight the sweetness and elevate the overall flavor profile. This simple addition transforms a great tartlet into a gourmet experience.
Creative Twists and Variations
This recipe is a playground. Here are some of my favorite ways to switch things up:
Tropical Pineapple Crunch
Replace the coconut milk with coconut‑infused pineapple juice and fold in diced fresh pineapple. The tartness balances the sweetness and adds a juicy texture. Perfect for summer gatherings.
Chocolate Coconut Explosion
Swirl in a ribbon of melted dark chocolate into the filling before baking. The chocolate adds depth, while the toasted coconut provides a contrasting crunch. Serve with a dusting of cocoa powder.
Savory Coconut & Herb
Swap the sweet filling for a savory blend of shredded coconut, chopped cilantro, lime zest, and a splash of soy sauce. This version pairs wonderfully with grilled shrimp or fish.
Almond Butter Delight
Add 2 tablespoons of almond butter to the filling for a nutty undertone and extra protein. The almond butter also thickens the filling, giving it a richer mouthfeel.
Coconut Mango Meringue
Top the finished tartlets with a dollop of whipped coconut cream and fresh mango slices. The meringue adds a light, airy contrast to the dense coconut base.
Spiced Cinnamon Twist
Incorporate 1 teaspoon of ground cinnamon into the filling for a warm, aromatic flavor. The cinnamon pairs beautifully with the coconut, creating a comforting dessert perfect for chilly evenings.
Storing and Bringing It Back to Life
Fridge Storage
Store cooled tartlets in an airtight container in the refrigerator for up to 3 days. The crust will stay crisp, while the filling remains creamy. Before serving, let them sit at room temperature for 10 minutes to restore their natural aroma.
Freezer Friendly
Wrap each tartlet individually in plastic wrap, then place them in a freezer bag. They’ll keep for up to 2 weeks without compromising flavor. When ready, thaw overnight in the refrigerator.
Best Reheating Method
To reheat, preheat the oven to 300°F (150°C). Place the frozen tartlets on a baking sheet and warm for 10–12 minutes. Add a tiny splash of water before reheating to create steam, which helps the filling regain its silky texture.