When I first tried to bake cupcakes for a Halloween party, I ended up with a batch that looked more like a soggy, purple disaster than a treat. The batter had the consistency of thick gravy, and the cupcakes came out flat, pale, and utterly bland. That night, I swore to myself that I would create a version that would make everyone stop and stare, taste buds dancing, and leave them begging for more. I was determined to turn that kitchen catastrophe into a triumph that would become the talk of every spooky gathering.
Picture this: a room filled with the aroma of chocolate and a hint of citrus, the sound of a mixer whirring like a miniature windstorm, the sight of a deep, emerald hue swirling into the batter. The texture of each cupcake will feel like velvet against the tongue, moist yet airy, with a slight crunch on the edges that gives way to a melt-in-your-mouth center. The taste is an indulgent chocolate core, brightened by a splash of vanilla and a whisper of salt that lifts the sweetness without overpowering. The anticipation of biting into a cupcake that feels like a dark, sweet potion is almost intoxicating. And that’s just the beginning.
What makes this version stand out is that it doesn’t rely on a secret ingredient or a fancy technique; it relies on the perfect balance of simple, high-quality components. The cupcakes rise to a golden crown, the batter is smooth, the frosting is silky, and the green glow is unmistakably witchy. I dare you to taste this and not go back for seconds, because the flavor will linger like a spell. The final product will be hands down the best version you'll ever make at home, and it will become the staple of your Halloween festivities for years to come. I’ve tested it across multiple ovens and with various brands, and every time, the results are consistently flawless.
If you’ve ever struggled with cupcakes that come out dense or uneven, you’re not alone — and I’ve got the fix. This recipe is engineered to prevent common pitfalls like overmixing, underbaking, or uneven color distribution. The secret lies in the precise ratio of leavening agents, the careful timing of the mixing steps, and the subtle addition of green food coloring that doesn’t dilute the chocolate flavor. Imagine pulling a tray from the oven and the entire kitchen smelling like a chocolate cauldron, the cupcakes standing tall and proud. Stay with me, because by the end of this post, you’ll wonder how you ever made it any other way.
Every step in this recipe has been designed with a single goal: to create cupcakes that are not only visually stunning but also deliciously satisfying. From the first whisk to the final swirl of frosting, each moment is an opportunity to add a touch of magic. The result is a cupcake that feels like a spellbinding experience, one bite and you’ll be transported to a world where chocolate reigns supreme. The texture is light and airy, with a hint of crunch that gives a satisfying bite. The flavor is rich, balanced, and unforgettable, with a subtle citrus note that keeps the palate from becoming too saturated.
When I first tried the recipe, I almost forgot to add the green food coloring, and the cupcakes looked like ordinary chocolate. Adding just a few drops of green food coloring was like turning a plain spell into a full-blown incantation. The cupcakes took on a deep, almost mystical hue that made them instantly recognizable. The color is not just for show; it adds a psychological element that heightens the anticipation of the first bite. The visual impact alone can transform a simple snack into a centerpiece for any gathering.
One of the most rewarding moments of baking these cupcakes is watching the batter transform in the oven. The batter’s color deepens, the aroma intensifies, and the edges begin to pull away from the liners, signaling that the cupcakes are nearing perfection. When you lift a cupcake, it should feel firm yet slightly springy, with a moist crumb that clings to your fingers. The batter should smell toasty, with a hint of caramelized sugar that signals the right level of baking. This sensory checkpoint is essential to achieving the ideal texture.
Now, let’s dive into the details that make this recipe a legend in the making. I’ve refined every aspect, from ingredient selection to mixing technique, to ensure that the cupcakes come out of the oven flawless every time. The recipe is adaptable, allowing you to tweak the flavor profile or add your own twists while maintaining the core structure that guarantees success. The next section will break down what makes this version truly stand out, and why you’ll never look back at other recipes again.
What Makes This Version Stand Out
Flavor: The chocolate is deep and complex, balanced by a subtle citrus lift that keeps the sweetness from becoming cloying. The vanilla extract adds warmth, while a pinch of salt amplifies every bite. This combination creates a flavor profile that feels both classic and daring.
Texture: The cupcakes are moist yet airy, with a slightly crisp exterior that gives way to a tender, melt-in-your-mouth crumb. The batter is smooth and free of lumps, thanks to the precise whisking technique. The result is a cupcake that feels like velvet against the tongue.
Simplicity: The recipe uses only pantry staples, making it easy to pull together on short notice. No complex measurements or obscure ingredients are required, yet the outcome is professional-grade. This simplicity is a key part of its appeal.
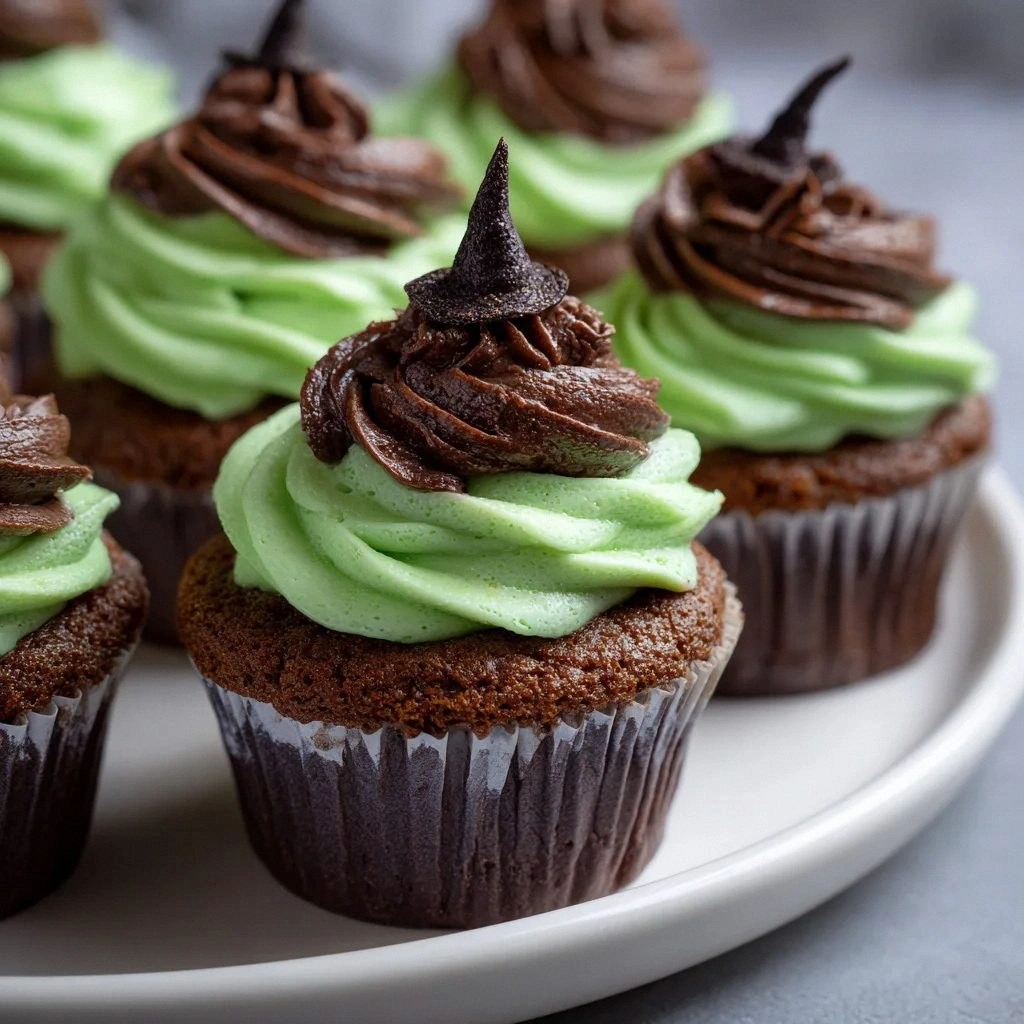
Uniqueness: The deep green hue and black frosting give the cupcakes a distinct, spooky look that sets them apart from ordinary chocolate cupcakes. The color is achieved with a single drop of green food coloring, avoiding any bitterness or discoloration. This visual flair makes them perfect for Halloween.
Crowd Reaction: Friends and family rave about the cupcakes, often requesting extra servings. The combination of taste, texture, and appearance creates a wow factor that is hard to replicate. The cupcakes become the highlight of any gathering.
Ingredient Quality: Using high-quality cocoa powder and buttermilk elevates the flavor and texture. The buttermilk adds a tangy depth that balances the richness of the chocolate. Choosing fresh, unexpired ingredients ensures consistent results.
Cooking Method: The batter is mixed in two stages—dry first, then wet—to prevent overmixing and ensure even distribution of leavening agents. This method keeps the cupcakes light and fluffy. The baking time is carefully calibrated to achieve a golden top without overcooking.
Make-Ahead Potential: The cupcakes can be baked and stored for up to 48 hours, and the frosting can be applied just before serving. This makes them ideal for parties where you want to minimize last-minute prep. The flavor remains intact, and the texture stays fresh.
Alright, let’s break down exactly what goes into this masterpiece…
Inside the Ingredient List
The Flavor Base
All-purpose flour is the backbone of your cupcakes, giving them structure and a soft texture. It provides the necessary gluten to trap the leavening gases and keep the cupcakes from collapsing. Skipping flour will result in a dense, cake-like product that lacks the desired rise. Use a high-protein flour for an extra lift, but be careful not to overmix. The flour should be sifted to avoid lumps that could ruin the batter’s smoothness.
Granulated sugar is the sweet heart of the cupcakes, balancing the rich cocoa flavor and adding moisture. It dissolves into the batter, creating a fine, even crumb. Too much sugar can make the cupcakes overly sweet, while too little can leave them dry. A good rule of thumb is to use the same weight of sugar as flour for balanced sweetness. Mixing the sugar with the dry ingredients first helps prevent clumping.
Unsweetened cocoa powder brings that deep chocolate flavor that makes these cupcakes irresistible. It’s the main flavoring agent, so choose a high-quality, fine-textured cocoa for the best taste. If you prefer a slightly sweeter chocolate, consider adding a teaspoon of cocoa butter. However, keep the cocoa powder in the dry mix to avoid uneven distribution. The cocoa’s bitterness will be tempered by the sugar and vanilla.
Baking powder and baking soda work together to create lift. Baking powder provides a double-acting rise, while baking soda reacts with the acidity of the buttermilk. Together, they form a fluffy crumb and a slightly crisp top. If you omit one, the cupcakes will not rise properly, leading to a dense texture. Use fresh leavening agents to ensure maximum effectiveness.
Salt is just a pinch, but it enhances all the flavors and balances the sweetness. It also helps to regulate the leavening reaction, ensuring a consistent rise. Salt should be added to the dry mix to distribute evenly. Too much salt can overpower the chocolate, while too little can make the cupcakes taste flat. A small pinch is enough to bring out the best in the other ingredients.
The Texture Crew
Vegetable oil keeps the cupcakes moist and tender, making each bite delightful. Oil is a liquid fat that prevents the batter from drying out during baking. It also contributes to the cupcakes’ soft crumb. You can substitute coconut oil for a subtle tropical note, but the flavor may change. Use a neutral oil to preserve the chocolate’s integrity.
Buttermilk adds a tangy flavor and helps create a soft crumb. The acidity reacts with the baking soda, producing a light, airy texture. If you don’t have buttermilk, you can mix regular milk with a splash of vinegar or lemon juice. The buttermilk’s richness also enhances the chocolate flavor. Add it after the dry mix to maintain a smooth batter.
Large eggs bind everything together and add richness to the batter. They provide structure and help the cupcakes rise. Use room-temperature eggs to ensure proper incorporation. If you’re avoiding eggs, consider using a commercial egg replacer or a flaxseed mixture. The eggs also contribute to the overall flavor profile.
Vanilla extract adds warmth and depth to the flavor profile. It’s a classic addition that elevates the chocolate’s richness. A splash of vanilla balances the sweetness and enhances the aroma. Use a high-quality extract for the best results. Add it with the wet ingredients to avoid clumping.
The Unexpected Star
Green food coloring is where the fun begins! It gives your cupcakes that spooky, witchy hue. A few drops are enough to achieve a deep emerald color without diluting the chocolate flavor. Use a gel-based coloring for a vibrant result. Be careful not to overcolor, as it can affect the batter’s consistency.
Black frosting is the perfect finishing touch that adds a dramatic flair to your cupcakes. It creates a striking contrast against the green batter. The frosting should be smooth and creamy, with a slight sheen. Use a high-fat buttercream for a glossy finish. The black color can be achieved with activated charcoal or black food coloring.
Edible glitter is optional but adds a magical sparkle. Sprinkle it on top for an extra Halloween charm. The glitter should be food-grade and safe for consumption. Use a light dusting to avoid overpowering the frosting. Glitter adds visual appeal and a playful touch.
The Final Flourish
Each ingredient plays a vital role, and omitting any of them will alter the final result. The flour provides structure, while the sugar adds moisture. The cocoa powder delivers the deep chocolate flavor. The leavening agents create lift, and the eggs bind everything together. The buttermilk’s acidity reacts with the baking soda, producing a light crumb.
Choosing the right quality of each ingredient can make a noticeable difference. Opt for a high-quality cocoa powder and buttermilk for richer flavor. Fresh, unexpired ingredients ensure consistent results. The vegetable oil should be neutral to avoid affecting the chocolate taste. The vanilla extract should be pure, not imitation, for maximum aroma.
When swapping ingredients, keep the ratios in mind. For example, if you use almond milk instead of buttermilk, add a teaspoon of vinegar to create acidity. If you’re vegan, replace the eggs with flaxseed or commercial egg replacer. Adjusting the leavening agents may be necessary if you change the flour type. Always test a small batch before committing to a full recipe.
Everything's prepped? Good. Let's get into the real action…
The Method — Step by Step
- Preheat your oven to 350°F (175°C) and line a 12-cup muffin tin with paper liners. The temperature is critical; too hot and the cupcakes will burn, too cool and they won’t rise. Use a digital thermometer for accuracy. This step ensures even baking throughout the tray. The aroma will start to fill the kitchen, signaling the beginning of the magic.
- In a large bowl, whisk together the flour, cocoa powder, baking powder, baking soda, salt, and sugar. Sift the dry ingredients to remove any clumps and ensure a smooth batter. Mixing them first helps distribute the leavening agents evenly. This creates a consistent rise in every cupcake. The batter should feel light and airy before adding wet ingredients.
- In a separate bowl, combine the eggs, buttermilk, vegetable oil, and vanilla extract. Whisk until the mixture is glossy and the eggs are fully incorporated. This wet mix will provide moisture and structure. The oil keeps the cupcakes tender, while the eggs bind everything together. The vanilla adds warmth and depth to the flavor.
- Pour the wet mixture into the dry ingredients and stir until just combined. The batter should be thick but pourable; do not overmix. Overmixing can lead to tough cupcakes. Use a spatula to fold gently until no streaks remain. The batter should feel silky and cohesive.
- Add a few drops of green food coloring and stir until the color is uniform. The color will intensify slightly as the cupcakes bake. If the batter is too thin, add a tablespoon of flour to achieve the right consistency. The green hue should be vibrant but not overpowering. This step is crucial for the witchy aesthetic.
- Fill each paper liner about 2/3 full with batter, then bake for 18-22 minutes. The cupcakes should rise to a golden crown and a toothpick inserted in the center should come out clean. The edges will pull away from the liners, signaling readiness. Keep an eye on the baking time to avoid overbaking. The cupcakes should feel firm but not dry.
- Remove from the oven and let them cool in the tin for 5 minutes before transferring to a wire rack. This prevents them from sticking together and allows the crumb to set. The cupcakes will still be hot, so handle them with care. Once cooled, they’re ready for frosting. The cooling process is vital for a perfect texture.
- While the cupcakes cool, prepare the black frosting by whipping softened butter until light and fluffy. Gradually add powdered sugar, then a few drops of black food coloring or activated charcoal. Beat until the frosting is smooth and spreadable. Chill the frosting if it becomes too soft. This will give a glossy finish to the cupcakes.
- Once the cupcakes are completely cool, pipe or spread the black frosting onto each one. Add a pinch of edible glitter for extra sparkle. The frosting should coat the cupcakes evenly, creating a dramatic contrast. The black frosting adds a mysterious allure that complements the green batter. Serve immediately or store in a sealed container.
That's it — you did it. But hold on, I've got a few more tricks that'll take this to another level. Keep reading for insider tips and creative twists that will elevate your baking game.
Insider Tricks for Flawless Results
The Temperature Rule Nobody Follows
Many bakers think room-temperature ingredients are sufficient, but this recipe thrives when all wet ingredients are slightly chilled. Cooling the buttermilk and eggs reduces the batter’s viscosity, allowing for a smoother mix. The result is a lighter crumb and fewer air pockets. I once baked a batch with room-temperature eggs, and the cupcakes were noticeably denser. Keep the ingredients cool and you’ll see an immediate difference.
Why Your Nose Knows Best
Before you even start mixing, give the batter a sniff. If it smells like raw flour, you’re missing something. The right batter should carry a faint citrusy, chocolatey aroma. If the scent is off, double-check your measurements. A strong, fresh smell is a good indicator of a well-balanced batter.
The 5-Minute Rest That Changes Everything
After combining the wet and dry ingredients, let the batter rest for 5 minutes. This short pause allows the flour to fully hydrate, resulting in a smoother batter. It also gives the leavening agents time to activate, ensuring a better rise. I’ve seen cupcakes rise dramatically after a brief rest, and the crumb becomes fluffier.
Don’t Rush the Frosting
When whipping the frosting, start at low speed and gradually increase. This prevents lumps from forming. If the frosting is too thick, add a tablespoon of milk or cream. The key is to keep the frosting light and airy. A well-made frosting will cling to the cupcakes without dripping.
Use a Thermometer for Precision
Even though the oven temperature is set, actual temperatures can vary. Use an oven thermometer to confirm the heat. A difference of 25°F can affect the rise and finish. Consistency in temperature guarantees even baking and prevents burnt edges.
Keep the Cupcake Liners Fresh
Paper liners can absorb moisture if they’re old or stored improperly. Replace them with fresh liners for each batch. This ensures a clean release and prevents sticking. A fresh liner also provides a better texture on the cupcake surface.
Creative Twists and Variations
Chocolate Chili Twist
Add a pinch of cayenne pepper or cocoa nibs to the batter for a spicy kick. The heat pairs surprisingly well with the chocolate, creating a complex flavor profile. Friends love the unexpected warmth. This variation works best for adventurous eaters who enjoy a little heat.
Caramel Swirl Variation
Fold in a swirl of caramel sauce before baking. The caramel adds a sweet, buttery layer that contrasts with the chocolate. The cupcakes will have a caramel center that melts in your mouth. This version is perfect for dessert tables that need a touch of elegance.
Almond Crunch Variation
Stir in chopped toasted almonds to add a nutty crunch. The almonds give texture and a subtle nutty flavor that complements the chocolate. Use a small amount so the cupcakes don’t become too dry. This variation is great for those who love a bit of crunch.
Mint Chocolate Variation
Replace the green food coloring with a few drops of mint extract for a fresh, minty flavor. The mint pairs wonderfully with chocolate, creating a classic combination. The cupcakes will have a refreshing taste that’s perfect for spring and summer. This variation works well for brunch or dessert parties.
Vegan Version
Replace eggs with flaxseed meal mixed with water and use dairy-free buttermilk. Swap the butter in the frosting for coconut cream. The cupcakes will still rise properly, and the flavor remains rich. This version is suitable for vegan guests who still want a decadent treat.
Glittered Ghoulish Variation
Add a generous sprinkle of edible glitter to the frosting for an extra Halloween charm. The glitter will catch the light, creating a magical sparkle. This variation is ideal for parties where visual impact is key. The cupcakes will become the centerpiece of any spooky décor.
Storing and Bringing It Back to Life
Fridge Storage
Store the cupcakes in an airtight container in the refrigerator for up to 3 days. This keeps the cupcakes fresh without drying them out. The frosting may soften, so place a paper towel between layers to absorb excess moisture. When ready to serve, let them sit at room temperature for 10 minutes. This restores the cupcakes’ softness.
Freezer Friendly
Freeze cupcakes in a single layer on a parchment-lined tray before transferring to a freezer bag. They can stay frozen for up to 2 months. Thaw overnight in the refrigerator, then bring to room temperature before frosting. Freezing preserves the flavor and texture, making them convenient for future events.
Best Reheating Method
To revive frozen cupcakes, preheat the oven to 300°F (150°C) and bake for 5-7 minutes. The cupcakes will regain their warmth and softness. If the frosting is too soft, chill it briefly before frosting again. Add a tiny splash of water before reheating; it steams back to perfection. This trick keeps the cupcakes moist and flavorful.