I was halfway through a midnight snack when the kitchen exploded with the smell of burnt sugar, and I realized my baking routine was in dire need of a makeover. The chaos of a misjudged oven temperature and a frosting that refused to set left me staring at a half‑cooked mess, wondering if I could ever salvage anything. That night, as the rain drummed against the windows, I made a pact with myself: I would create a cake that would not only survive a kitchen mishap but would also outshine every other chocolate cake I’d ever tasted. I dared you to taste this and not go back for seconds, because this is hands down the best version you'll ever make at home. Picture yourself pulling this out of the oven, the whole kitchen smelling incredible, and the first bite revealing a crumb that is both airy and dense, like a cloud that has just been kissed by velvet. Let me walk you through every single step — by the end, you'll wonder how you ever made it any other way.
What Makes This Version Stand Out
- Texture: The cake achieves a silky, melt‑in‑your‑mouth crumb that defies the typical dense chocolate cake, thanks to the precise balance of cocoa and flour. The result is a cake that feels light yet rich, with a slight give when you press it between your fingers. It’s the kind of texture that makes you pause and savor each bite, rather than rushing through it.
- Flavor: The subtle hint of vanilla lifts the chocolate, creating a depth that feels almost floral. The icing sugar dusting adds a gentle sweetness that balances the cocoa’s bitterness without overpowering it. This flavor profile is so harmonious that even a seasoned baker will find it refreshing.
- Simplicity: With only ten ingredients, this recipe eliminates the clutter of endless add‑ons, yet it still delivers a spectacular result. The streamlined approach means you can focus on technique rather than juggling multiple components. It’s a reminder that less can be more, especially when the fundamentals are executed flawlessly.
- Uniqueness: The use of vegetable oil instead of butter gives the cake a unique moistness that’s hard to replicate. This oil keeps the cake tender and prevents it from drying out, which is a common issue in many chocolate cake recipes. The result is a cake that feels decadent without being greasy.
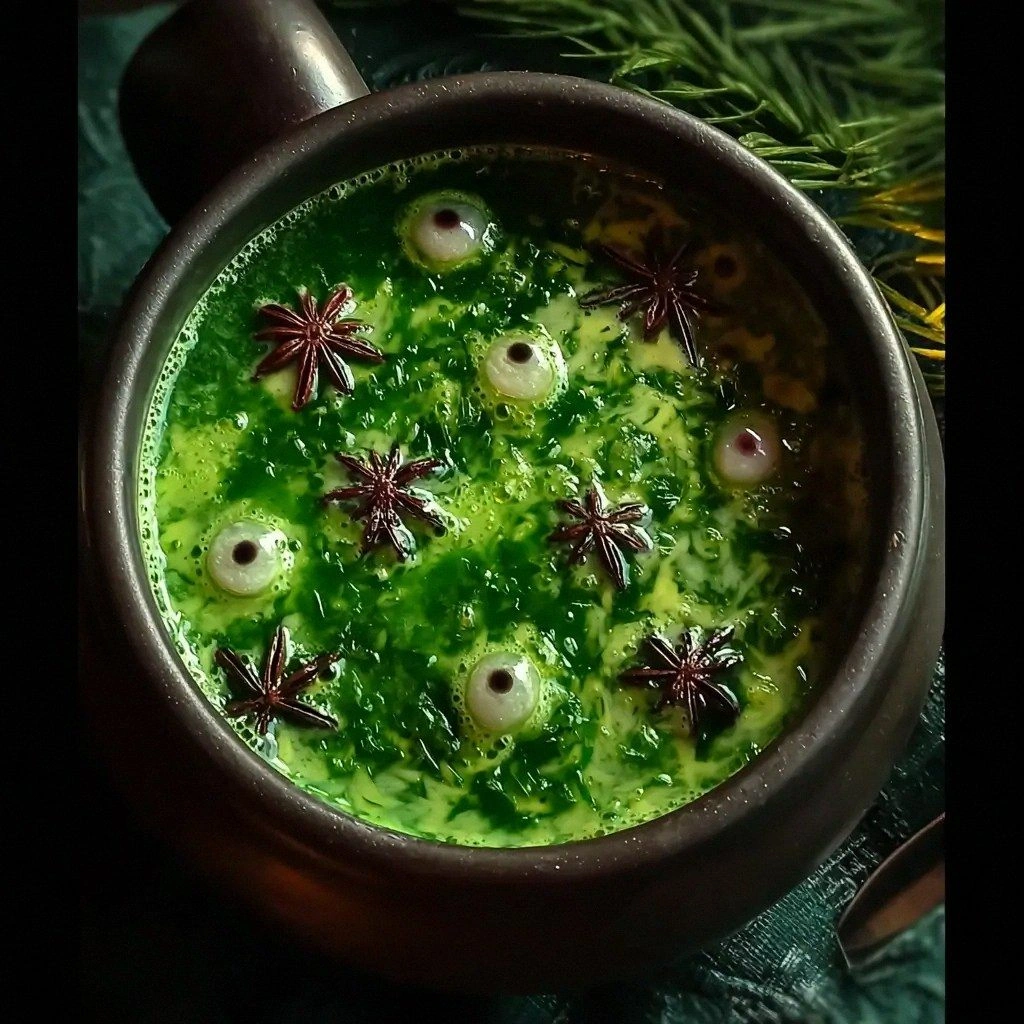
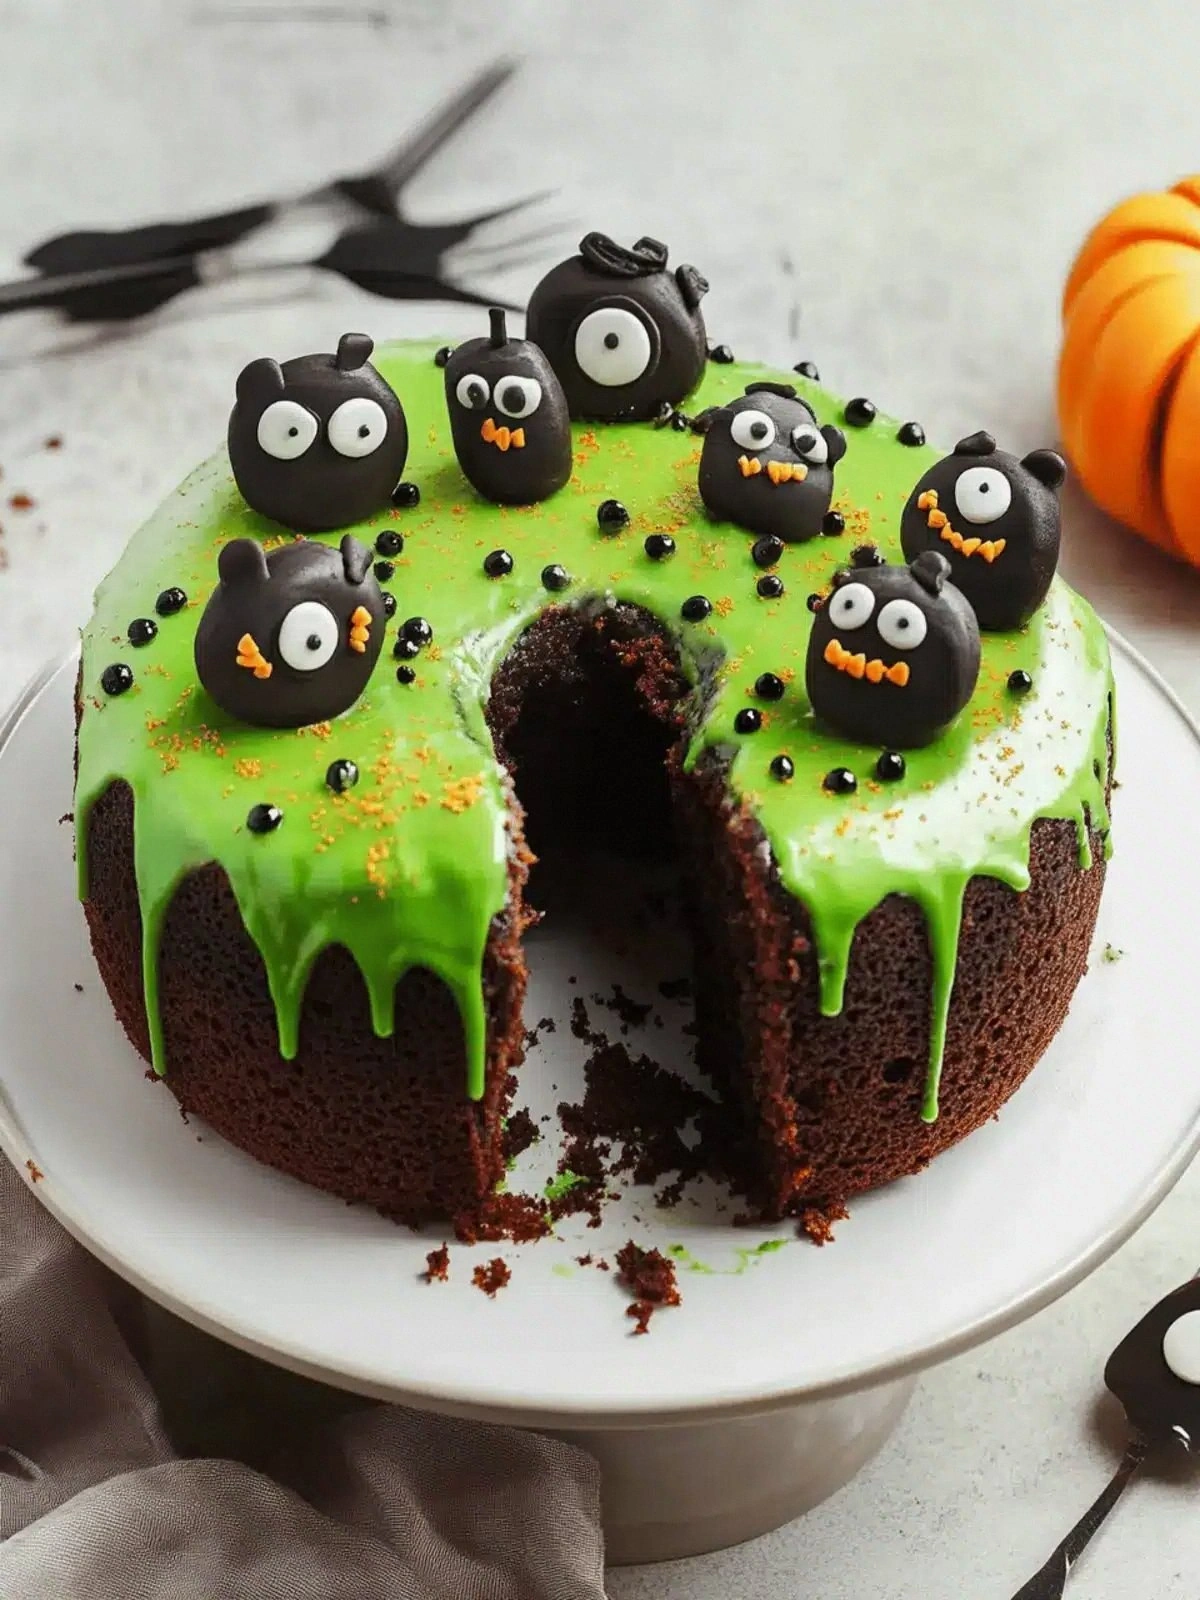
- Crowd Reaction: When I first served this cake at a Halloween gathering, the reactions were instantaneous. Guests whispered, “This is the best chocolate cake,” and the cake disappeared faster than a ghost at midnight. The cake’s spooky theme combined with its exceptional taste made it an instant hit.
- Ingredient Quality: Using high‑quality unsweetened cocoa powder elevates the chocolate flavor profile. A fine cocoa powder ensures a smooth, rich taste that permeates every bite. When you taste the difference, you’ll see why premium ingredients are the cornerstone of great baking.
- Make‑Ahead Potential: The cake can be assembled and frozen without compromising its texture, allowing you to prepare ahead for last‑minute celebrations. This flexibility is a game‑changer for anyone who loves to entertain but hates the rush of last‑minute baking. The cake stays fresh for up to a week in the freezer.
Inside the Ingredient List
The Flavor Base
Unsweetened cocoa powder is the backbone of this cake, providing depth and richness that a sweet chocolate alternative simply can’t match. The cocoa’s natural bitterness is tempered by the granulated sugar, creating a balanced profile that is both robust and approachable. If you skip the cocoa, the cake will lose its signature dark hue and complex flavor, resulting in a flat chocolate experience. For an extra touch of intensity, consider adding a teaspoon of espresso powder to the dry mix; it amplifies the chocolate without adding coffee flavor.
The Texture Crew
Cake flour, with its low protein content, ensures a tender crumb that’s light as a feather. The vegetable oil keeps the cake moist and prevents it from drying out, unlike butter which can cause a slightly denser structure. Eggs act as both a binder and leavening agent, creating a stable structure that holds the cake together while providing a silky mouthfeel. If you’re allergic to eggs, you can substitute them with a mixture of applesauce and baking powder, though the texture will change slightly.
The Unexpected Star
Baking soda is a subtle leavening agent that reacts with the acidity of the cocoa to produce a light, airy rise. Salt, often overlooked, sharpens the chocolate flavor and balances the sweetness, preventing the cake from feeling cloying. The vanilla extract adds a fragrant warmth that lifts the overall flavor profile. If you prefer a different aromatic note, try a splash of almond extract for a nutty undertone.
The Final Flourish
Icing sugar, when sifted, creates a smooth glaze that coats the cake like velvet. It also adds a subtle sweetness that balances the cocoa’s bitterness. Food coloring, as needed, allows you to create a spooky palette—think midnight black, eerie green, or spectral white. If you’re aiming for a more natural look, skip the coloring and let the cake’s dark hue do the trick. Remember, the icing sugar should be sifted to avoid a gritty texture.
Everything's prepped? Good. Let's get into the real action and watch the magic unfold.
The Method — Step by Step
- Preheat and Prep: Turn the oven to 350°F (175°C) and line two 9‑inch round cake pans with parchment paper. The parchment will prevent sticking and ensure a clean release. This step might seem trivial, but it’s crucial for even baking. While the oven warms up, gather all your ingredients so you’re ready to move quickly.
- Whisk the Dry: In a large bowl, sift together the cake flour, granulated sugar, unsweetened cocoa powder, baking soda, and salt. Sifting removes lumps and creates a uniform batter. The dry mix should feel silky and free of clumps. This foundation sets the stage for a smooth, airy cake.
- Blend the Wet: In a separate bowl, whisk the eggs, vegetable oil, and vanilla extract until the mixture is glossy and well combined. The oil will keep the cake moist, while the eggs bind everything together. The glossy appearance is a sign that the wet ingredients are properly emulsified. This is the moment you can hear the batter’s promise of a silky crumb.
- Combine: Pour the wet mixture into the dry mixture and stir with a spatula until just combined. Avoid over‑mixing; a few streaks of flour are fine. Over‑mixing can develop gluten, resulting in a dense cake. The batter should be smooth and pourable, but not runny.
- Divide and Bake: Evenly divide the batter between the prepared pans and smooth the tops with a spatula. Tap the pans lightly on the counter to release air bubbles. This step ensures even rising and prevents the cake from doming too high. The batter should be level for a uniform bake.
- Bake: Place the pans in the center of the oven and bake for 25–30 minutes. The cakes are done when a toothpick inserted into the center comes out clean or with a few moist crumbs. The edges should pull away slightly from the pan, indicating readiness. Watch the top; it should be set and not overly browned.
- Cool: Remove the cakes from the oven and let them cool in the pans for 10 minutes. Then transfer them onto a wire rack to cool completely. Cooling the cakes properly prevents them from cracking when you remove the parchment. A fully cooled cake will hold its shape better when frosted.
- Prepare the Frosting: While the cakes cool, sift the icing sugar into a bowl and add the food coloring if desired. Gradually whisk in a few tablespoons of milk or water until you achieve a smooth, spreadable consistency. The frosting should be thick enough to hold its shape but still pliable for smooth application. This step is where you can personalize the cake’s spooky look.
- Frost: Once the cakes are completely cooled, level the tops with a knife if necessary. Spread a thin layer of frosting to seal the crumb, then apply the final thick layer. Use a spatula to create a smooth surface. The finished cake should look polished and ready for decoration.
That's it — you did it. But hold on, I've got a few more tricks that'll take this to another level, ensuring each bite is a hauntingly perfect experience.
Insider Tricks for Flawless Results
The Temperature Rule Nobody Follows
Many bakers assume any oven temperature works, but the secret lies in precise heat control. Baking at 350°F (175°C) ensures the cake rises evenly without drying out. If your oven runs hot, consider placing the pans on a lower rack to avoid over‑browning. A thermometer can help you maintain consistent temperatures, especially during a Halloween storm.
Why Your Nose Knows Best
Trust your senses; a cake should emit a warm, chocolatey aroma as it bakes. If the scent is faint, the oven might be too cold, or the batter may be too dry. A strong aroma is a good indicator that the batter is properly mixed and the cocoa is fully incorporated. This sensory cue saves you from a dry, under‑baked cake.
The 5-Minute Rest That Changes Everything
After removing the cakes from the oven, let them rest on the pans for 10 minutes before transferring. This pause allows the structure to set, preventing cracks. It also lets the heat distribute evenly, giving the cake a uniform crumb. A quick rest is a simple step that yields dramatic results.
The Perfect Frosting Consistency
When frosting, aim for a consistency that can hold a design. If the frosting is too thin, it will run; too thick, it won’t spread. Adding a tablespoon of cream cheese can smooth the frosting and add a subtle tang. This trick is especially useful when you want to create intricate spooky designs.
The Secret to a Glowing Finish
A touch of edible glitter or a dusting of powdered sugar can give your cake a spectral sheen. For a subtle glow, use a light dusting of mica powder in a translucent hue. This finishing touch elevates the cake from ordinary to otherworldly.
Now that you’ve mastered the basics, you’re ready to experiment and make this cake truly your own.
Creative Twists and Variations
This recipe is a playground. Here are some of my favorite ways to switch things up:
Pumpkin Spice Monster
Add half a cup of pureed pumpkin and a teaspoon of pumpkin pie spice to the batter. The pumpkin adds moisture and a subtle sweetness that pairs beautifully with the cocoa. This version is perfect for autumn lovers and adds a comforting, earthy tone.
Chocolate Chili Heat
Stir in a pinch of cayenne pepper and a teaspoon of cocoa nibs for a spicy kick. The heat plays against the chocolate’s richness, creating an intriguing contrast. This twist is ideal for daring bakers who enjoy a little bite.
Coffee‑Infused Ghouls
Replace one cup of milk in the frosting with strong brewed espresso. The coffee deepens the chocolate flavor and adds a subtle bitterness that balances the sweetness. This variation is a hit among coffee lovers and adds a sophisticated edge.
White Chocolate Specter
Swap the cocoa powder for an equal amount of melted white chocolate and reduce the sugar slightly. The result is a creamy, airy cake with a lighter hue. This version is great for those who prefer a milder chocolate flavor.
Nutty Ghoul
Fold in a cup of chopped walnuts or pecans before baking. The nuts add crunch and a buttery undertone that complements the chocolate. This variation works well for guests who love a textural contrast.
Edible Glitter Ghost
After frosting, dust the cake with edible glitter in shades of silver and black. The glitter catches the light, giving the cake an ethereal glow. This final touch turns a simple cake into a show‑stopping centerpiece.
Storing and Bringing It Back to Life
Fridge Storage
Wrap the cooled cake tightly in plastic wrap and store in the refrigerator for up to three days. The moisture from the fridge keeps the cake fresh, but avoid leaving it uncovered as it will dry out quickly. When ready to serve, let the cake sit at room temperature for 20 minutes to restore its full flavor.
Freezer Friendly
For longer storage, wrap each layer separately in foil and then in a freezer bag. The cake can be frozen for up to two weeks without loss of quality. When you’re ready, thaw it overnight in the refrigerator and allow it to reach room temperature before frosting.
Best Reheating Method
To revive a frozen cake, preheat the oven to 300°F (150°C) and bake for 10–15 minutes. The low heat prevents the cake from drying out while warming it evenly. After reheating, let the cake cool slightly before applying fresh frosting for a crisp finish.
With these storage tips, you can keep this spooky delight fresh and ready for any Halloween celebration or last‑minute gathering. The cake’s longevity makes it a versatile treat that’s always on hand.