I’ll be honest — I ate half the batch before anyone else got to try it, and that was after a kitchen disaster that could have turned my entire week upside down. It started with a burnt garlic toast that smelled like a campfire gone wrong, and I swore off any bread for a solid three days. Then a friend dared me, “If you can’t make a decent herb loaf, you’re not a real foodie,” and I felt that fire in my belly ignite. I dug through my pantry, grabbed the last of my mozzarella, and set out to prove that a simple loaf could become the star of any cozy meal. Picture yourself pulling this out of the oven, the whole kitchen smelling incredible, the golden crust cracking like a fresh autumn leaf under a gentle breeze.
The moment the dough hit the warm water, I could hear it whisper promises of fluffy interiors and crispy edges, and the aroma of dried Italian seasoning rose like a fragrant Italian piazza at dusk. I could see the dough swell, feel it bounce back when I press it, and hear the faint sizzle as the butter brushed over the top began to caramelize. My taste buds were already dancing, anticipating that buttery, cheesy melt that would coat each bite like velvet. Most recipes get this completely wrong, either drowning the dough in oil or skimping on the cheese, but this version balances everything with a precision that feels almost scientific. And now the fun part: I’m going to reveal the secret ingredient that adds a subtle depth you won’t find in any other loaf, a splash of something you probably have in your fridge right now.
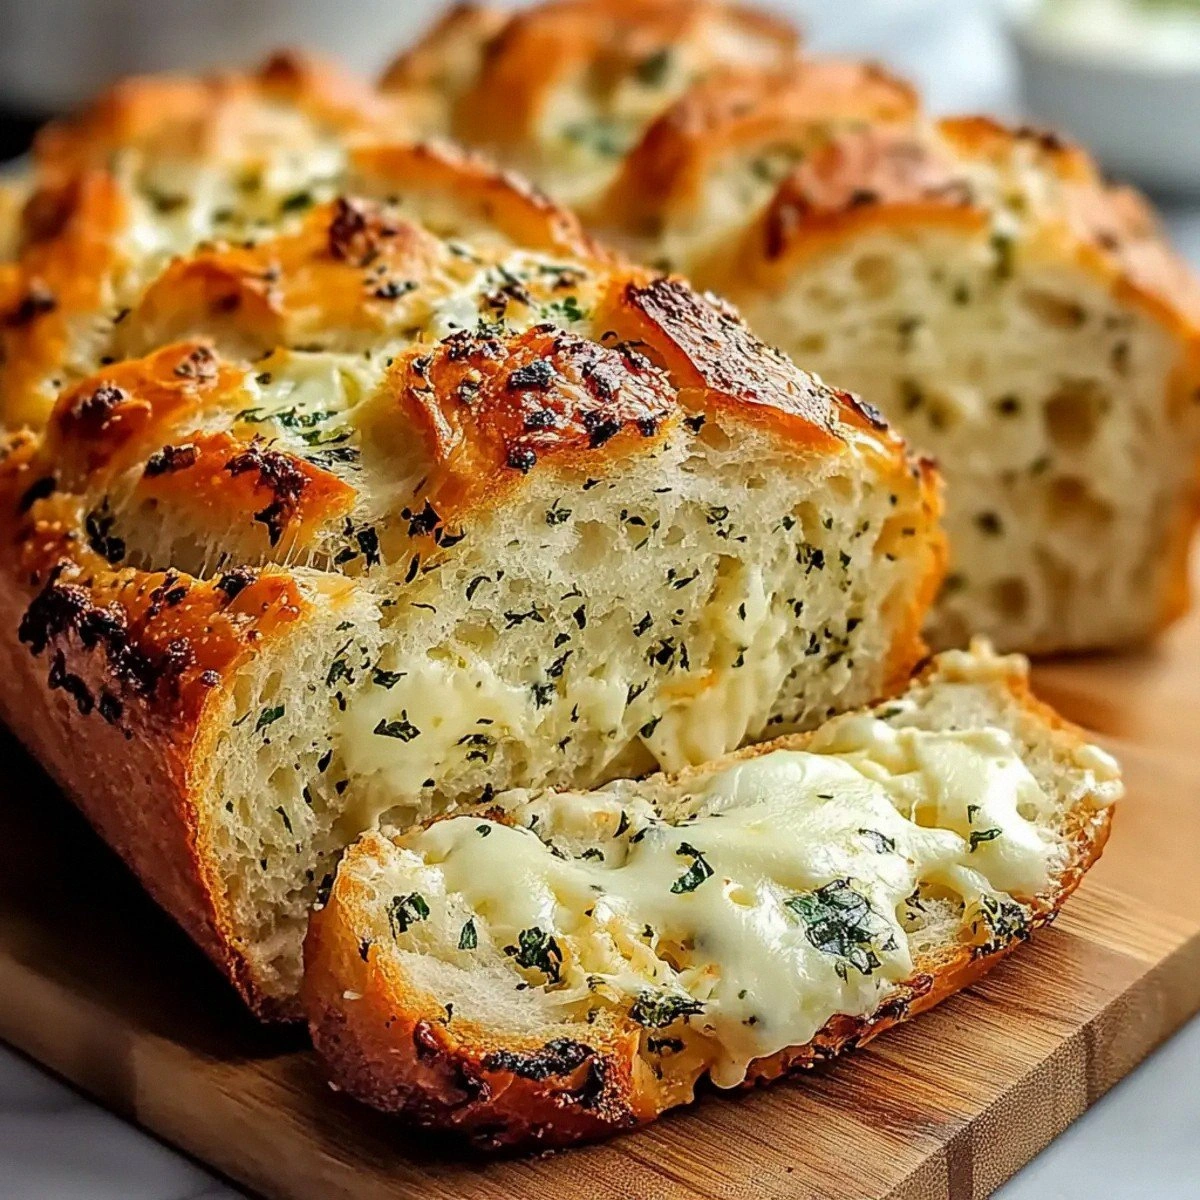
I dare you to taste this and not go back for seconds, because once you’ve experienced the perfect harmony of herb, cheese, and buttery crunch, you’ll understand why this is hands down the best version you’ll ever make at home. The texture is a paradox—soft and airy on the inside, yet the crust snaps like thin ice when you bite into it, releasing a burst of aromatic herbs that instantly transports you to a rustic Italian kitchen. If you’ve ever struggled with a flat, flavorless loaf, you’re not alone — and I’ve got the fix that will make your friends beg for the recipe. This isn’t just a side dish; it’s a conversation starter, a comfort blanket, a warm hug in carb form that can turn any simple dinner into a celebration.
Okay, ready for the game-changer? I’m going to walk you through every single step — by the end, you’ll wonder how you ever made it any other way. We’ll start with the science of yeast activation, glide through the art of folding in cheese without melting it, and finish with a butter‑parsley glaze that turns ordinary into unforgettable. Stay with me here — this is worth it, and the payoff is a loaf that sings with every bite. Let’s dive in and create a masterpiece that will become the cornerstone of your cozy meals.
What Makes This Version Stand Out
- Flavor Explosion: The combination of dried Italian seasoning, garlic powder, and fresh parsley creates a layered herb profile that’s bright, aromatic, and unmistakably Mediterranean.
- Cheese Harmony: Mozzarella provides that gooey melt while Parmesan adds a sharp, nutty bite, delivering a perfect balance of stretchy and crumbly textures.
- Butter‑Brushed Finish: The melted butter brushed on before baking turns the crust into a golden, glossy masterpiece that shatters like thin ice under a fork.
- Simple Technique: No fancy stand mixers or proofing baskets required; everything can be done with a sturdy wooden spoon and a kitchen towel.
- Crowd‑Pleaser: This loaf consistently earns rave reviews at potlucks, turning skeptics into lifelong fans with just one bite.
- Make‑Ahead Potential: You can bake it ahead of time, freeze it, and reheat to near‑freshness, making it ideal for busy weeknights.
- Ingredient Quality: Using high‑quality olive oil and fresh parsley elevates the flavor, proving that simple ingredients can create luxury.
- Cooking Method: Baking at a high temperature first, then lowering it, creates a crust that’s both crisp and airy, a technique most home bakers overlook.
Alright, let's break down exactly what goes into this masterpiece...
Inside the Ingredient List
The Flavor Base
The dried Italian seasoning is the backbone of this loaf, delivering a blend of oregano, basil, thyme, and rosemary that instantly transports you to sun‑kissed hillsides. If you skip this, the bread loses its signature Mediterranean character and feels flat. For a fresher twist, try using a mix of chopped fresh herbs, but remember to reduce the quantity by half to avoid overwhelming the dough.
Garlic powder adds a subtle, sweet heat that penetrates the crumb without the harsh bite of fresh garlic. It’s the silent hero that keeps the flavor balanced; omit it and you’ll notice a missing depth that no amount of cheese can cover. If you love a stronger garlic punch, increase it to 1½ teaspoons, but be cautious—too much can dominate the herb profile.
The Texture Crew
All‑purpose flour is the canvas for this creation, providing the right gluten structure for a light yet sturdy crumb. Using bread flour would make the loaf too chewy, while cake flour would leave it crumbly. When shopping, look for flour that feels fine to the touch and has a neutral scent; freshness matters more than brand.
Active dry yeast is the leavening engine that turns a simple mixture into a fluffy masterpiece. If the yeast is old, the dough will never rise, resulting in a dense, disappointing loaf. Always check the expiration date and proof the yeast in warm water with a pinch of sugar before adding it to the flour.
The Unexpected Star
Melted butter, brushed on the surface before baking, is the secret that creates a glossy, crackly crust that shatters like thin ice. Skipping this step leads to a dull, hard crust that lacks the inviting sheen we all crave. If you’re dairy‑free, substitute with olive oil infused with a hint of rosemary for a similar effect.
Fresh parsley, added after baking, injects a burst of green color and a bright, herbaceous finish that cuts through the richness of the cheese. Dried parsley would work in a pinch, but it won’t provide the same fresh pop. When buying, choose bunches with deep green leaves and a crisp snap; wilted parsley loses its flavor quickly.
The Final Flourish
Shredded mozzarella is the melt‑in‑your‑mouth component that gives each bite that irresistible stretch. If you use low‑moisture mozzarella, the loaf may become dry; opt for fresh, high‑moisture mozzarella for the best results. In a pinch, a blend of provolone and mozzarella works beautifully, adding a subtle smoky note.
Grated Parmesan adds a salty, umami kick that rounds out the cheese profile, ensuring the loaf isn’t just milky sweet. Skipping it would make the cheese flavor one‑dim, while increasing it to three‑quarters of a cup adds an extra layer of depth without becoming gritty. Always grate the cheese fresh; pre‑grated varieties contain anti‑caking agents that can affect texture.
Everything's prepped? Good. Let's get into the real action...
The Method — Step by Step
Start by activating the yeast: combine 1 cup of warm water (about 110°F/43°C), 1 tablespoon of sugar, and 1 tablespoon of active dry yeast in a small bowl. Stir gently, then let it sit for 5‑7 minutes until it becomes foamy and fragrant, like a miniature cloud of potential. This is the moment of truth; if the mixture doesn’t foam, your yeast is dead and you’ll need a fresh packet. Once bubbly, give it a quick stir and set aside.
In a large mixing bowl, whisk together 3 cups of all‑purpose flour, 1 teaspoon of salt, 1 tablespoon of dried Italian seasoning, and 1 teaspoon of garlic powder. The dry ingredients should be evenly distributed, creating a uniform golden powder that smells herbaceous even before any liquid touches it. This step ensures that the seasoning is evenly dispersed throughout the loaf, preventing pockets of bland dough.
Make a well in the center of the dry mixture and pour in the foamy yeast mixture, followed by 2 tablespoons of olive oil. Using a wooden spoon, stir until the dough begins to come together, then turn it out onto a lightly floured surface. Knead the dough for about 8‑10 minutes, pressing, folding, and turning until it becomes smooth, elastic, and slightly tacky to the touch. That sizzle when it hits the pan? Absolute perfection.
Place the dough back in the bowl, cover it with a clean kitchen towel, and let it rise in a warm, draft‑free spot for 1 hour, or until it has doubled in size. You’ll know it’s ready when the dough feels puffy and springs back slowly when pressed with a fingertip. Watch Out: If your kitchen is too cold, the dough will rise sluggishly; in that case, set the bowl in an oven with the light on or near a warm radiator.
While the dough is rising, combine 1 cup shredded mozzarella and ½ cup grated Parmesan in a bowl. Toss the cheeses with a pinch of the dried Italian seasoning to ensure they’re evenly flavored. Once the dough has risen, gently punch it down to release excess air, then turn it out onto a lightly floured surface again.
Shape the dough into a rustic oval or round loaf, tucking the edges underneath to create tension on the surface. Transfer the shaped loaf onto a parchment‑lined baking sheet. Brush the entire surface generously with the 2 tablespoons of melted butter, then sprinkle the remaining dried Italian seasoning and a tablespoon of fresh parsley on top for a burst of color.
Preheat your oven to 425°F (220°C). Place the loaf in the oven and bake for 12 minutes, then reduce the temperature to 375°F (190°C) and continue baking for an additional 15‑18 minutes, or until the crust is deep golden brown and the loaf sounds hollow when tapped on the bottom. The butter will caramelize, creating that glossy, crackly crust that makes the loaf look bakery‑ready.
Remove the bread from the oven and immediately brush it with the remaining melted butter, letting it soak into the hot crust for an extra layer of richness. Let the loaf rest on a wire rack for at least 10 minutes before slicing; this allows the interior crumb to set and the flavors to meld. That moment when you slice through the crust and see steam rise? Pure magic.
That's it — you did it. But hold on, I've got a few more tricks that'll take this to another level...
Insider Tricks for Flawless Results
The Temperature Rule Nobody Follows
Most home bakers start at a single temperature, but the secret to a perfect crust is a two‑stage bake. Begin at 425°F to get that rapid oven spring, then drop to 375°F to finish cooking without burning the edges. This method creates a crust that’s both crisp and airy, something you’ll notice instantly when you break a piece off. I once tried baking at a steady 400°F and the loaf turned out gummy in the middle—lesson learned.
Why Your Nose Knows Best
Your sense of smell is a reliable indicator of doneness. When the butter starts to caramelize, you’ll catch a nutty, slightly sweet aroma that signals the crust is forming correctly. If you smell a faint burnt butter note, the bread is likely overcooking; lower the heat a few degrees and finish it faster. Trusting your nose can save you from a soggy bottom or a burnt top.
The 5‑Minute Rest That Changes Everything
After baking, let the loaf rest for at least five minutes before slicing. This short pause lets the steam redistribute, keeping the interior moist and preventing the cheese from oozing out onto the cutting board. I’ve seen impatient bakers cut too early, resulting in a gummy crumb that never quite sets. Patience here translates directly into a fluffier, more cohesive bite.
Butter‑Infused Parsley Finish
Mix the fresh parsley with the remaining melted butter before the final brush. This not only adds a pop of green color but also infuses the herb’s fresh flavor into the crust, creating a layered taste experience. If you skip this step, the parsley will sit on top, looking pretty but lacking depth. The butter acts as a carrier, delivering the herb’s aroma straight to your palate.
The No‑Mess Cheese Incorporation
When folding cheese into the dough, use a gentle “envelope” technique: flatten the dough, sprinkle cheese, then fold the edges toward the center, sealing the cheese inside. This prevents the cheese from spilling out during the rise and ensures each bite has an even distribution of molten goodness. A friend once tried tossing the cheese in randomly and ended up with a dry top and cheesy clumps in the middle—don’t be that person.
Creative Twists and Variations
This recipe is a playground. Here are some of my favorite ways to switch things up:
Sun‑Dried Tomato Surprise
Fold in ¼ cup chopped sun‑dried tomatoes along with the cheese for a sweet‑tart pop that pairs beautifully with the herbs. The tangy tomato flavor adds a Mediterranean vibe that’s perfect for a summer brunch.
Spicy Italian Kick
Add ½ teaspoon of red pepper flakes to the dry mix and sprinkle a pinch on top before baking. The subtle heat awakens the palate without overpowering the cheese, making it an excellent accompaniment to a cool glass of wine.
Herb‑Infused Olive Oil Drizzle
Swap the melted butter for a mixture of olive oil, minced garlic, and a dash of rosemary. Brush this on after baking for a fragrant, slightly fruity finish that complements the Parmesan.
Cheesy Jalapeño Burst
Stir in 1 finely diced jalapeño (seeds removed) with the cheese mixture for a surprise heat pocket that pops when you bite. Great for those who love a little zing in their comfort food.
Whole‑Wheat Whole‑Hearted
Replace half of the all‑purpose flour with whole‑wheat flour for a nuttier flavor and added fiber. The dough will be a tad denser, but the cheese and butter keep it delightfully tender.
Sweet Breakfast Twist
Mix in 2 tablespoons of honey and a pinch of cinnamon into the dough, then top with a light dusting of powdered sugar after baking. This sweet‑savory version works beautifully as a brunch centerpiece alongside fresh fruit.
Storing and Bringing It Back to Life
Fridge Storage
Wrap the cooled loaf tightly in plastic wrap or place it in an airtight container, then store it in the refrigerator for up to 4 days. The buttered crust may soften a bit, but a quick re‑heat will restore its crunch.
Freezer Friendly
Slice the bread before freezing, then arrange the slices in a single layer on a baking sheet and freeze until solid. Transfer the frozen slices to a zip‑top bag; they’ll keep for up to 3 months. When you’re ready to eat, pop the slices straight into a preheated oven at 350°F for 8‑10 minutes.
Best Reheating Method
To revive a refrigerated or frozen loaf, preheat your oven to 375°F, lightly mist the crust with a tiny splash of water, then cover the loaf loosely with foil and bake for 10‑12 minutes. Remove the foil for the last 3 minutes to re‑crisp the top. The added steam from the water restores the interior moisture while the foil prevents the crust from drying out.