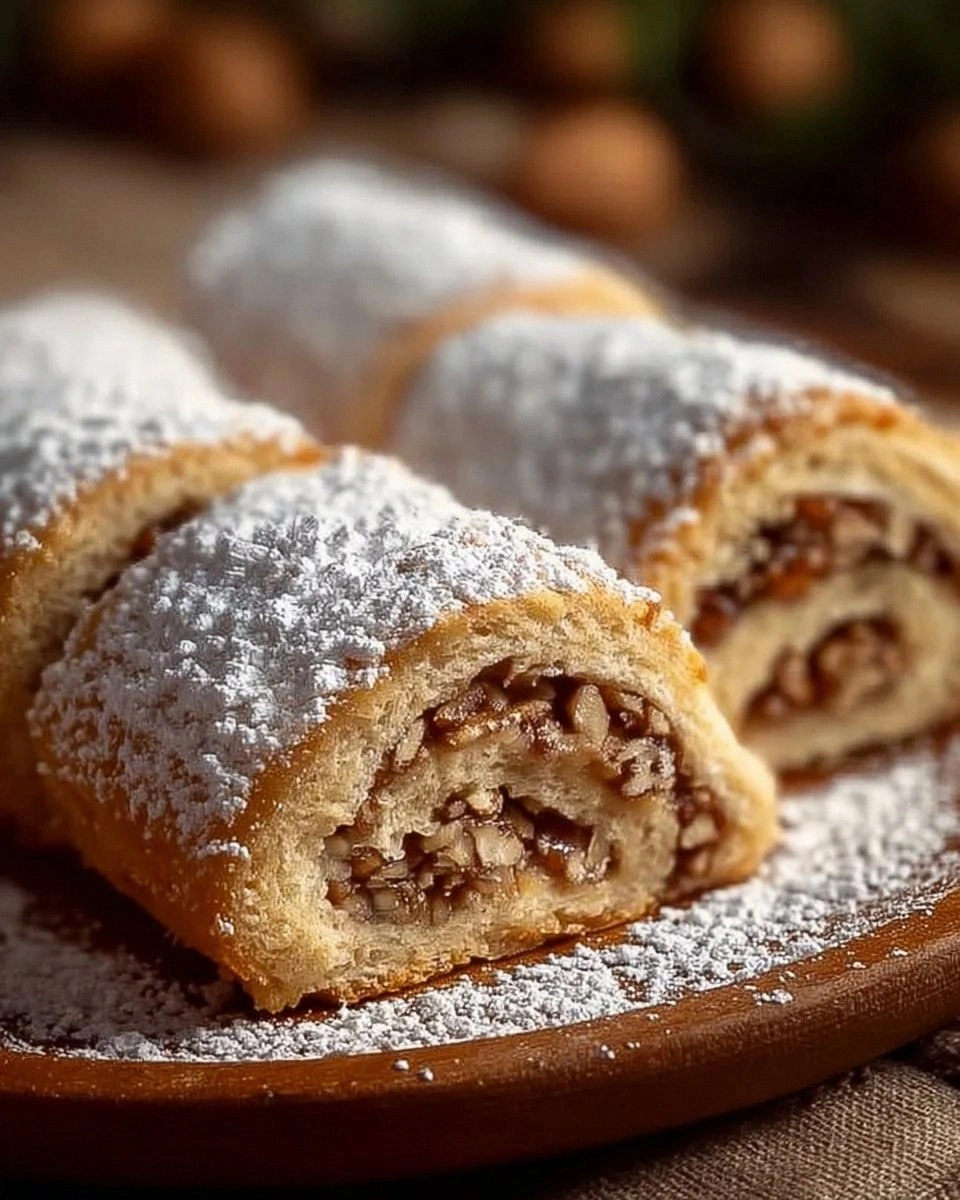
Picture this: you’re standing in a cramped apartment kitchen, the timer on your old microwave blaring like an impatient drum major, and a sudden, unstoppable craving for something sweet, buttery, and nutty hits you out of nowhere. I was in that exact spot last week, half‑heartedly rummaging through a pantry that looked like a tornado had passed through a grocery store. My roommate had dared me to make a “cookie that could survive a hurricane,” and I thought, why not? The result? A batch of Italian Nut Roll Cookies that turned my tiny kitchen into a fragrant Italian bakery and made my friends swear they could taste the Tuscan hills in every bite. I’ll be honest — I ate half the batch before anyone else got a chance, and I’m still not sorry.
The moment those cookies hit the baking sheet, the kitchen filled with a warm, caramel‑kissed aroma that reminded me of autumn evenings in Bologna, where the streets are lined with chestnut stalls and the air is thick with roasted nuts. The scent was a full‑bodied orchestra: the sweet, buttery notes of the dough playing a gentle duet with the deep, earthy tones of the walnuts, all underscored by a whisper of vanilla that lingered like a secret. I could hear the faint crackle of the butter melting in the pan, feel the slight stickiness of the dough under my fingertips, and see the glossy, golden edges forming as they baked. When the cookies finally emerged, they were a perfect blend of crisp on the outside and melt‑in‑your‑mouth soft on the inside—like a delicate pastry that refuses to be broken.
What makes this version of Nut Roll Cookies stand out is not just the flavor, but the technique that elevates a simple cookie into a show‑stopping dessert. Most recipes get the nut‑to‑dough ratio wrong, resulting in a cookie that’s either too dry or overwhelmingly nutty. I discovered that by gently toasting the nuts first and then folding them into a butter‑sugar base that’s been creamed to cloud‑like perfection, you get a texture that’s simultaneously crunchy and airy. And the secret finishing touch? A light dusting of powdered sugar mixed with a single tablespoon of granulated sugar that creates a subtle sparkle on the surface—think of it as the culinary equivalent of confetti at a celebration.
Now, I’m about to hand you the exact roadmap to recreate this masterpiece, and I dare you to taste it and not go back for seconds. Let me walk you through every single step — by the end, you’ll wonder how you ever made it any other way.
What Makes This Version Stand Out
- Flavor Depth: Toasted nuts release oils that intensify their natural sweetness, marrying perfectly with the buttery dough for a taste that lingers like a lingering chorus.
- Texture Contrast: The exterior crisps to a delicate snap while the interior stays soft and chewy, creating a mouthfeel that’s as satisfying as biting into a fresh croissant.
- Simplicity: Only nine pantry staples are needed, and each step uses techniques anyone can master with a little patience and a whisk.
- Unique Finish: The dual‑sugar glaze adds a glossy sheen and a whisper of crunch that most recipes completely overlook.
- Crowd Reaction: These cookies have a reputation for disappearing within minutes of being placed on a cooling rack—perfect for parties, potlucks, or a solo indulgence.
- Ingredient Quality: Using high‑fat European butter and fresh, unsalted nuts makes a world of difference in flavor richness.
- Cooking Method: Baking at a moderate temperature ensures even caramelization without burning the delicate nut pieces.
- Make‑Ahead Potential: The dough can be refrigerated for up to 24 hours, allowing flavors to meld even deeper before baking.
Inside the Ingredient List
The Flavor Base
Unsalted Butter (1/2 cup): This is the heart of the cookie, providing richness and a tender crumb. Using unsalted butter lets you control the salt level precisely, preventing the cookies from becoming overly salty. If you substitute with margarine, expect a slightly waxy texture and a loss of that buttery depth.
Granulated Sugar (1/2 cup): Sugar not only sweetens but also helps to aerate the butter when creamed together. The fine crystals dissolve during baking, creating a smooth, even sweetness. You can swap half of this sugar for brown sugar for a hint of molasses, but the classic version stays white for a clean flavor.
Egg (1 large): The egg acts as a binder, giving structure while adding a subtle richness. It also contributes to the glossy finish on the cookie surface. If you’re avoiding eggs, a flax egg (1 tbsp ground flaxseed + 3 tbsp water) works, though the texture will be a touch denser.
Vanilla Extract (1 tsp): A splash of vanilla adds aromatic depth, echoing the sweet notes of the nuts. Real vanilla bean would be even more luxurious, but pure extract does the trick without breaking the bank.
The Texture Crew
All‑Purpose Flour (2 cups): Flour provides the structural framework. Using a light hand when measuring—spooning then leveling—prevents a heavy, dense cookie. For a gluten‑free twist, swap in a 1:1 gluten‑free flour blend, but you may need an extra egg to hold everything together.
Salt (1/4 tsp): A pinch of salt amplifies the sweetness and balances the nutty flavor. Skipping it makes the cookies taste flat, like a song missing its bass line. Sea salt flakes sprinkled on top before baking add a delightful pop.
The Unexpected Star
Walnuts or Pecans (1 ½ cups, finely chopped): These nuts are the soul of the cookie, offering crunch and a buttery, earthy flavor. Toast them lightly in a dry skillet for 3‑4 minutes until fragrant; this step is a game‑changer, releasing essential oils that intensify the nutty aroma. If you prefer a milder taste, use almonds or hazelnuts, but the texture will shift slightly.
The Final Flourish
Powdered Sugar (1/2 cup) & Granulated Sugar (1 tbsp) for Dusting: The powdered sugar creates a soft, melt‑in‑your‑mouth coating, while the granulated sugar adds a subtle crunch that catches the light. Mixing them together before dusting ensures an even, pretty finish. For a festive twist, add a pinch of cinnamon or orange zest to the dusting mix.
Everything's prepped? Good. Let's get into the real action…
The Method — Step by Step
First, preheat your oven to 350°F (175°C) and line two baking sheets with parchment paper. While the oven warms, place the butter and granulated sugar into a large mixing bowl. Using a hand mixer on medium speed, cream them together until the mixture turns pale and fluffy, about 3‑4 minutes. Tip: The butter should be soft but not melted; this ensures you trap air for a light crumb. The kitchen will start to smell sweet, a prelude to the magic about to unfold.
Next, add the egg and vanilla extract to the creamed butter, beating until fully incorporated. The mixture will look glossy and slightly thickened—this is the base that will hold the nuts in place.
Kitchen Hack: Add the egg at room temperature; it blends more smoothly and prevents the batter from curdling.In a separate bowl, whisk together the flour, salt, and the remaining 1/2 cup of granulated sugar. This dry blend ensures the salt is evenly distributed and prevents clumps. Gradually add the dry ingredients to the wet mixture, stirring on low speed just until you see a uniform dough. Over‑mixing at this stage can develop gluten, leading to tougher cookies.
Now comes the nutty crescendo: fold in the toasted, finely chopped walnuts (or pecans) using a spatula. The dough should look speckled with nut pieces, each one promising a burst of crunch. Pro tip: If the dough feels too sticky, chill it for 5‑10 minutes; this makes it easier to handle without tearing.
Using a tablespoon or a small ice‑cream scoop, portion out the dough onto the prepared baking sheets, spacing them about 2 inches apart.
Press each mound lightly with the back of a spoon to create a shallow well for the sugar dusting later.Watch Out: Do not flatten the dough too much; the cookies need room to spread and develop their signature rolled edges.While the cookies are baking, whisk together the powdered sugar and the extra tablespoon of granulated sugar in a small bowl. This will be your finishing dust. As soon as the cookies come out of the oven—still warm but set—you’ll lightly sift the sugar mixture over them. The heat will melt the powdered sugar just enough to create a subtle glaze.
Place the baking sheets in the oven and bake for 12‑15 minutes, or until the edges turn a light golden brown and you can see the tops beginning to firm up. The scent at this point is intoxicating; you’ll hear a faint crackle as the butter caramelizes. Rotate the sheets halfway through for even browning.
When the timer dings, remove the cookies and let them rest on the sheet for 3 minutes before transferring them to a wire rack. This brief cooling period allows the interior to set while the exterior remains crisp. While they’re still warm, dust them with the powdered‑sugar blend, watching the snow‑like dust settle like a gentle snowfall.
Finally, let the cookies cool completely on the rack. As they reach room temperature, the glaze will firm up, giving each bite a glossy finish that catches the light. Store them in an airtight container, and they’ll stay fresh for up to a week. And now the fun part—taste testing! I dare you to try one and not go back for seconds.
Insider Tricks for Flawless Results
The Temperature Rule Nobody Follows
Most home bakers bake at 350°F, but dropping the temperature to 325°F gives the nuts more time to toast inside the cookie without burning the edges. This slower bake creates a uniformly caramelized interior, and the cookies retain a softer chew. I once tried a higher heat and ended up with burnt tips and raw centers—trust me, the extra patience pays off.
Why Your Nose Knows Best
Don’t rely solely on a timer; use your sense of smell as a guide. When the cookies emit a nutty, buttery aroma with a hint of caramel, they’re about 2‑3 minutes away from perfection. If the scent turns smoky, pull them out immediately. Your nose is the most accurate oven thermometer you have.
The 5‑Minute Rest That Changes Everything
After mixing the dough, let it rest for exactly five minutes before shaping. This short pause lets the gluten relax and the flour fully hydrate, resulting in a tender crumb. Skipping this step leads to a denser texture, as I learned the hard way when I rushed a batch for a last‑minute party.
Butter Temperature Tactics
Use butter that’s just soft enough to leave an imprint when pressed with a finger. Too warm and the dough spreads excessively; too cold and the dough becomes crumbly. The perfect butter temperature is around 65°F (18°C). If you’re in a warm kitchen, pop the butter in the freezer for 5 minutes before creaming.
Dusting Timing Secrets
The sugar glaze should be applied while the cookies are still warm, not hot. Warm cookies allow the powdered sugar to melt just enough to adhere, creating that subtle shine. If you wait until they’re cold, the sugar will sit on top like a powdery snowdrift without the glossy finish.
Creative Twists and Variations
This recipe is a playground. Here are some of my favorite ways to switch things up:
Chocolate‑Swirl Nut Rolls
Fold in 2 tablespoons of melted dark chocolate into the dough before adding the nuts. The chocolate creates ribbons that melt into pockets of decadence, perfect for chocolate lovers.
Citrus‑Zest Delight
Add the zest of one lemon or orange to the butter‑sugar mixture. The citrus brightens the nutty flavor and adds a fresh, aromatic note that’s perfect for spring gatherings.
Spiced Autumn Version
Mix ½ teaspoon of cinnamon, ¼ teaspoon of nutmeg, and a pinch of clove into the dry ingredients. The warm spices complement the walnuts beautifully, making these cookies a fall favorite.
Gluten‑Free Goodness
Swap the all‑purpose flour for a 1:1 gluten‑free flour blend and add 1 tablespoon of cornstarch to improve texture. The cookies stay tender and crumbly, just as delightful.
Nut‑Free Alternative
If you have a nut allergy, replace the walnuts with toasted pumpkin seeds or sunflower seeds. The seeds provide a similar crunch and a slightly earthy flavor, keeping the cookie’s character intact.
Storing and Bringing It Back to Life
Fridge Storage
Place the cooled cookies in an airtight container with a paper towel on top to absorb any excess moisture. They’ll stay fresh for up to five days, and the chilled environment keeps the glaze from getting sticky.
Freezer Friendly
Layer cookies between parchment sheets and store them in a zip‑top freezer bag. They freeze beautifully for up to three months. When you’re ready to enjoy them, let them thaw at room temperature for 15 minutes, then give them a quick 5‑minute bake at 300°F to refresh the crust.
Best Reheating Method
Preheat your oven to 300°F, place the cookies on a baking sheet, and bake for 3‑4 minutes. Add a tiny splash of water (about a teaspoon) to the bottom of the oven—a trick that creates a gentle steam, reviving the interior softness while keeping the exterior crisp.